Chapter 3: Retouching and Repairing
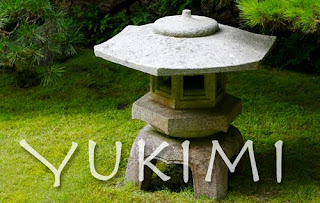
In this chapter we started off by editing the Japanese stone garden lantern where the bottom edge of the photograph was torn. One way to heal the edge of this image is to utilize the Clone Stamp tool which uses pixels from one area of the image to replace pixels in another area. So, start by selecting the clone stamp tool in the options bar then click Alt so that the pointer becomes a target and allows you to sample a specific part of the image. You would then start at the top of the rip and drag the clone stamp tool across, resample and drag more until the tear is completely eliminated.
To erase the sprinklers that appear in the background, it is simple enough to use the spot healing brush since the area we are removing is so small and doesn't have a lot to detract from our sampling.
The second part of the lesson is an overview of removing grafitti off of a stone wall using the the healing brush tool by painting over the graffiti with the mouse. You could also use the patch tool which allows you to draw around the area you are going to erase, click the selection then drag it to another area that is similar to what you are wanting over the original selection.
It is suggested in the reading to edit the photos on a duplicate layer so that the original file is not damaged and/or because you can blend the edited version with the original to give it a more natural feel.

No comments:
Post a Comment